Blueberry Ice Cream

Lucas Schneider
| 07-08-2026
 · Cate team
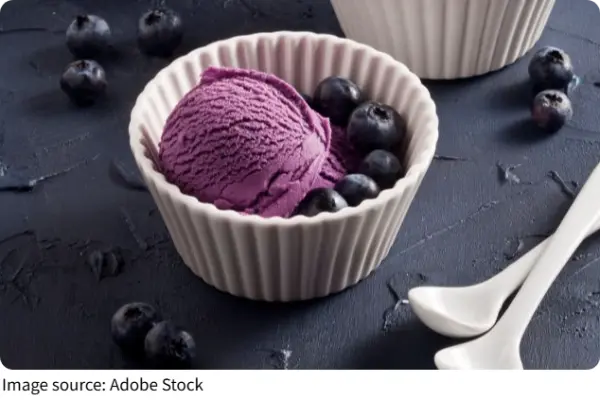
Are you looking for a cool and fruity dessert to enjoy on a warm day? Today, we are making homemade blueberry ice cream! This recipe combines fresh blueberries, rich cream, and a smooth custard base to create a dessert that tastes like summer in every spoonful.
The bright purple color and sweet berry flavor make it a wonderful treat for family gatherings or a quiet afternoon at home.
The best part is that we can prepare it with either fresh or frozen blueberries, so this recipe works all year long.
Why We Love Homemade Blueberry Ice Cream
Making ice cream at home gives us full control over the ingredients. We can use real berries and fresh dairy ingredients without adding artificial flavors. The result is a creamy dessert with a natural fruit taste. Blueberries are also full of color and provide a pleasant balance between sweetness and a little tartness. When mixed with cream and vanilla, they create a soft and refreshing flavor that many people enjoy.
This recipe makes about one quart of ice cream, enough for about four to six servings.
Ingredients We Need
For this blueberry ice cream, prepare the following ingredients:
- 2 cups blueberries, fresh or frozen
- 1 cup granulated sugar, divided
- 1 tablespoon lemon juice
- 2 cups heavy cream
- 1 cup whole milk
- 1/4 teaspoon salt
- 1/2 teaspoon vanilla extract
- 3 large egg yolks
Optional:
- 1 teaspoon grated lemon zest for extra freshness.
Step 1: Cook the Blueberries
- Place the blueberries, 1/4 cup sugar, and lemon juice into a small saucepan.
- Heat over medium heat until the berries begin to release their juices. Gently press the berries with a spoon while cooking. Continue simmering for about 8 to 10 minutes until the fruit becomes soft and the mixture thickens slightly.
- This step helps bring out the deep berry flavor and gives the ice cream its beautiful color.
Step 2: Blend and Strain
- Transfer the cooked berries into a blender or use a hand blender. Blend until smooth.
- Pour the puree through a fine mesh strainer into a bowl. Use the back of a spoon to press the mixture through the strainer, leaving the seeds and skins behind.
- Set the smooth blueberry puree aside.
Step 3: Prepare the Cream Mixture
- Pour 1 cup of heavy cream into a medium bowl and stir in the vanilla extract.
- Place a fine mesh strainer over the bowl and keep it nearby. We will use it later to create an extra smooth texture.
Step 4: Heat the Dairy Base
In a saucepan, combine:
- 1 cup whole milk
- Remaining 1 cup heavy cream
- Remaining 3/4 cup sugar
- 1/4 teaspoon salt
- Heat the mixture over medium heat, stirring gently until it becomes hot and begins to steam. Do not let it boil.
- The warm dairy mixture helps create a rich and silky ice cream base.
Step 5: Temper the Egg Yolks
- Place the egg yolks in a small bowl and whisk until smooth.
- Slowly pour about 1 cup of the warm milk mixture into the yolks while whisking continuously. This process gently raises the temperature of the eggs and keeps them smooth.
- After mixing, pour the egg mixture back into the saucepan.
Step 6: Add the Blueberry Puree
- Stir the strained blueberry puree into the saucepan.
- Cook over low heat for several minutes, stirring often. The mixture is ready when it becomes slightly thick and coats the back of a spoon.
- Avoid heating it too quickly, as gentle cooking creates the best texture.
Step 7: Strain and Chill
- Pour the mixture through the prepared strainer into the bowl containing the vanilla cream.
- Stir until everything is fully combined.
- Place the bowl in an ice bath and let it cool to room temperature. Cover and refrigerate for at least 4 to 6 hours, or overnight.
- This chilling step is important because a cold base churns into smoother ice cream.
Step 8: Churn the Ice Cream
- Pour the chilled mixture into an ice cream maker.
- Churn according to the machine instructions, usually about 20 to 25 minutes, until the mixture becomes thick and creamy.
- At this stage, the ice cream will have a soft-serve texture.
Step 9: Freeze Before Serving
- Transfer the churned ice cream into a freezer-safe container.
- Cover and freeze for another 2 to 4 hours to allow it to become firmer.
- When serving, let the container sit at room temperature for a few minutes. This makes scooping easier and gives the ice cream an even creamier texture.
Helpful Tips for Better Ice Cream
- Add a little lemon zest for a brighter flavor.
- Straining both the berry puree and custard creates an extra smooth result.
- Use full-fat dairy ingredients for the richest texture.
- Store the ice cream in an airtight container to keep it fresh.
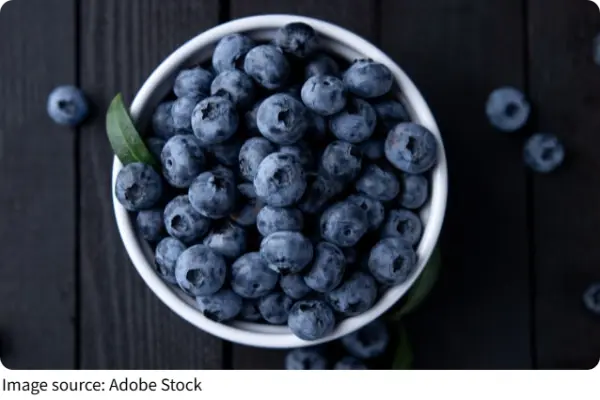
Lykkers, homemade blueberry ice cream is a simple dessert that feels special with every bite. The creamy texture and natural berry flavor make it perfect for summer afternoons, celebrations, or a relaxing evening at home.
Why not gather the ingredients and make a batch this week? We would love to know how you enjoy your blueberry ice cream and what toppings you choose. Happy dessert making, and see you in our next delicious recipe!