How to Make Bread at Home

Julian
| 10-10-2026
 · Cate team
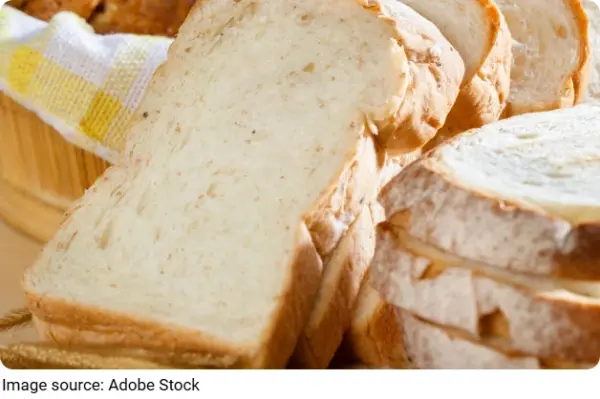
Lykkers! Freshly baked bread brings warmth and comfort to any kitchen. With a crisp golden crust and a soft, tender interior, homemade bread is a delicious addition to breakfast, sandwiches, and everyday meals.
Although baking bread may seem complicated, the process becomes manageable when you follow a reliable recipe and allow enough time for the dough to rise.
This recipe uses everyday ingredients and straightforward techniques to help you bake a flavorful loaf from scratch. From mixing and kneading to shaping and baking, each step guides you toward a satisfying homemade result.
Ingredients
- 3 cups (375 g) all-purpose flour or bread flour
- 1 cup (240 ml) warm water
- 2 teaspoons (7 g) instant yeast
- 1 tablespoon (12 g) granulated sugar
- 1 teaspoon (6 g) salt
- 2 tablespoons (30 ml) vegetable oil or melted butter
Use comfortably warm water rather than hot water, as excessive heat can damage the yeast. Bread flour generally produces a chewier texture, while all-purpose flour creates a softer crumb.
Equipment Needed
- Large mixing bowl
- Measuring cups and spoons or a kitchen scale
- Wooden spoon or spatula
- Clean work surface
- Loaf pan or baking tray
- Clean kitchen towel
- Oven
- Cooling rack
A loaf pan creates a traditional sandwich loaf, while a baking tray is suitable for a round or oval loaf.
Instructions
1. Mix the Ingredients
Combine the flour, instant yeast, sugar, and salt in a large mixing bowl. Add the warm water and vegetable oil or melted butter, then stir until a rough dough forms.
If the dough feels unusually dry, add water one teaspoon at a time. If it is excessively sticky, incorporate a little flour gradually. Aim for a soft dough that feels slightly tacky without sticking excessively to your hands.
2. Knead the Dough
Transfer the dough to a lightly floured surface. Knead for 8–10 minutes by pressing it forward with the heel of your hand, folding it back, and repeating the movement.
The dough should become smooth, elastic, and easier to handle. Kneading develops the gluten structure needed to give the loaf its shape and texture.
3. Let the Dough Rise
Place the dough in a lightly greased bowl and turn it to coat the surface. Cover with a clean kitchen towel and leave it in a warm, draft-free place for approximately 1–1½ hours, or until it has roughly doubled in size.
Rising time varies with room temperature and yeast activity, so judge the dough by its volume rather than the clock alone.
4. Shape the Loaf
Gently press the risen dough to release some trapped air. Transfer it to a clean work surface and shape it into a loaf.
Place it seam-side down in a lightly greased loaf pan. If using a baking tray, shape the dough into a round or oval instead.
5. Allow the Second Rise
Cover the shaped dough loosely and leave it to rise for another 30–45 minutes, or until noticeably puffed. Avoid allowing it to expand excessively, as overproofed dough may collapse during baking.
During this time, preheat the oven to 375°F (190°C).
6. Bake Until Golden
Place the loaf in the preheated oven and bake for approximately 25–35 minutes, depending on its size and shape. The crust should be golden brown, and the loaf should sound hollow when tapped on the bottom.
For a more reliable check, insert a food thermometer into the center. A temperature of approximately 190–200°F (88–93°C) generally indicates that standard yeast bread is fully baked. If the crust browns too quickly, loosely cover the top with foil for the remaining baking time.
7. Cool Before Slicing
Remove the loaf from the oven and carefully take it out of the pan. Transfer it to a cooling rack and allow it to cool for at least 30–60 minutes.
Cooling allows the interior to set properly, helping prevent compressed or gummy slices. Use a serrated blade to cut the loaf cleanly.
Tips for Better Homemade Bread
- Measure the flour accurately: Weighing ingredients helps produce consistent results.
- Check the yeast: Use fresh yeast to ensure the dough rises properly.
- Keep the dough soft: Adding too much flour can result in a dense loaf.
- Allow sufficient proofing: The dough needs time to expand before baking.
- Knead thoroughly: Proper gluten development supports a light, even crumb.
- Avoid cutting the loaf while hot: Cooling improves the texture and makes slicing easier.
How to Serve and Store Bread
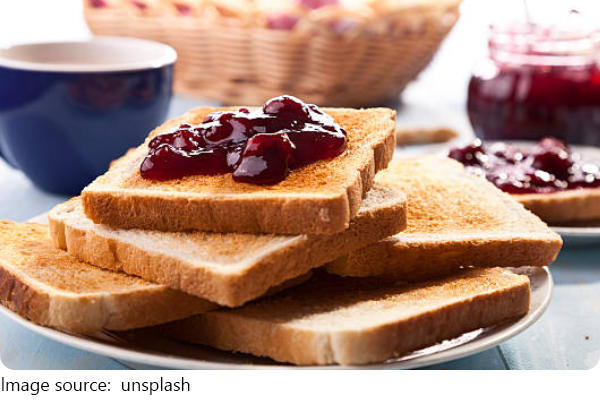
Serve homemade bread with butter, fruit jam, or peanut butter for breakfast. It also makes excellent sandwiches or can be toasted for a crisp, golden finish. For a simple snack, top a slice of toast with banana or your favorite spread.
Once completely cooled, store the loaf in a clean, airtight bag or container at room temperature. For the best quality, use it within approximately 2–3 days. To keep it longer, slice the bread and freeze it in a freezer-safe bag. Separating the slices before freezing makes it easier to take out individual portions when needed.
Enjoy Freshly Baked Bread
Homemade bread is a rewarding kitchen staple that requires only a handful of everyday ingredients and a little patience. By kneading the dough properly, allowing it to rise sufficiently, and baking it until golden, you can create a loaf with a tender interior and a satisfying crust.
Once you master this basic recipe, experiment with different shapes and flour varieties to suit your preferences. Whether served fresh, made into sandwiches, or toasted for breakfast, homemade bread offers a simple and versatile addition to your table.