Easy Hedgehog Cake

Kenji
| 05-06-2026
 · Cate team
Hello, Lykkers! Ever thought about making a ridiculously adorable hedgehog cake without needing any fancy baking skills?
It is much easier than you might think, with no crazy pan shapes or professional baking skills required! This cute little creature is perfect for birthdays or just because you want something fun to bake. This is such an easy cake to make: 3 round layers, a batch of chocolate frosting, and a batch of peanut butter frosting.
The end result looks impressive, but the process is surprisingly straightforward. Let's break it down into simple steps that even beginners can follow.
What You'll Need
For this hedgehog cake, you'll need three round cake layers that are each about 6 inches in diameter. You can use your favorite cake recipe or a box mix. The two frosting types create a nice contrast: chocolate for the spiky back and peanut butter for the face and belly. You can pipe the eyes on with frosting if you'd like, but candy eyes and a jellybean nose work great too. For the hedgehog's quills, chocolate cookie sticks or wafer sticks create that signature spiky texture. Simple decorating tools like piping bags and a basic round tip are all you need.
Cake Layers:
- All-purpose flour – 2 cups
- Sugar – 1 ½ cups
- Eggs – 3 large
- Butter – ½ cup, melted
- Milk – 1 cup
- Baking powder – 2 tsp
- Vanilla extract – 1 tsp
- Salt – ½ tsp
This makes 3 × 6-inch cake layers.
Frosting:
- Chocolate frosting – 1 ½ cups
- Peanut butter frosting – 1 ½ cups
Decoration:
- Chocolate cookie sticks – 20–30 pieces
- Candy eyes – 2 pieces
- Jellybean or chocolate ball – 1 (nose)
Baking the Cake Layers
- Preheat the oven to 350°F (175°C). Grease and line three 6-inch round cake pans with parchment paper.
- In a large bowl, whisk together the flour, baking powder, and salt.
- In a separate bowl, whisk the sugar, eggs, melted butter, milk, and vanilla extract until smooth.
- Gradually add the dry ingredients to the wet ingredients and mix until a smooth batter forms. Do not overmix.
- Divide the batter evenly among the three prepared cake pans.
- Bake for 20–25 minutes, or until a toothpick inserted into the center comes out clean.
- Let the cakes cool in the pans for 10 minutes, then transfer them to a wire rack to cool completely before frosting and assembling.
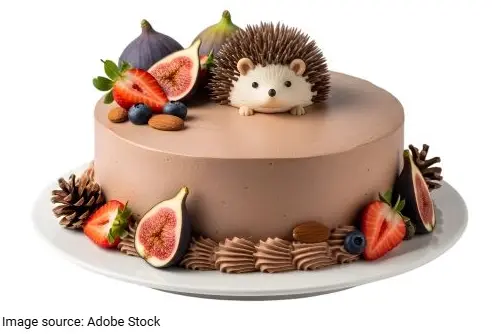
Building the Hedgehog Shape
Start by stacking your three cooled cake layers with a thin layer of frosting between each one. This creates the basic rounded body shape. The beauty of this design is that you don't need to carve the cake into complex shapes. The natural stacking creates that dome-like hedgehog body.
Once stacked, apply a crumb coat (a thin layer of frosting) over the entire cake and refrigerate for about 15 minutes. This makes the final frosting layer much smoother and easier to apply. Then frost the face area with peanut butter frosting and the back with chocolate frosting.
Adding the Spiky Details
The most fun part is creating the hedgehog's quills. Break chocolate cookie sticks into shorter pieces and insert them into the chocolate frosted back area, starting from the top and working your way down. Angle them slightly upward to mimic real hedgehog spines.
For the face, add your eyes (either piped or using candy) and a jellybean or chocolate ball for the nose. If you notice the frosting warming because of the heat of your hand, refrigerate the bag for a few minutes then continue to decorate once it's had time to chill.
Tips for Success
Make sure your cake layers are completely cooled before you start frosting. Warm cake will cause the frosting to melt and slide off. If you're short on time, pop the layers in the freezer for 20 minutes to speed up the cooling process. You can store your cake, covered, for a few days at room temperature. The combination of chocolate and peanut butter flavors makes this cake as delicious as it is cute. Don't stress about making it perfect; part of the charm is that each hedgehog cake looks unique.
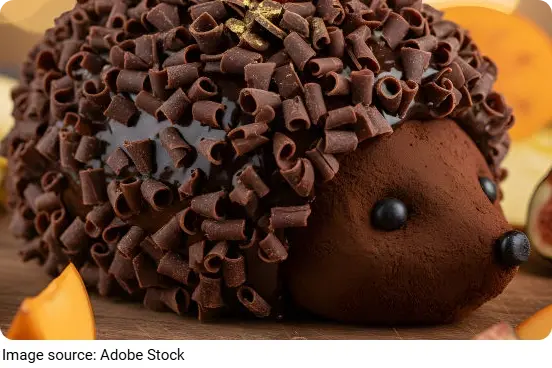
This hedgehog cake proves that impressive looking desserts don't require professional skills or expensive equipment. With three simple layers, two types of frosting, and some chocolate sticks, you can create something that will make everyone smile. The process is forgiving, the ingredients are straightforward, and the result is absolutely delightful. So grab your mixing bowls and give this adorable project a try!